 |
| Big Rock, Foothills County, Alberta, Canada |
Micro Shotgun Rig - Part One (https://mtnmanblog.blogspot.com/2020/04/micro-shotgun-rig-designed-and-proto.html). In Part One I explained where the idea came from and shared a few pictures of the finished micro rig. In Part Two; we will carry on and discuss the actual construction of a micro rig.

The picture to the right is what the finished micro shotgun rig looks like. To get to that point required a few steps.
The first part was the main bag that everything is fixed to or built on. Then, the pockets were designed and added. Finally, the side seams were sewn together. After that, the various shotshell cards were sewn up. This took me ten-hours to complete.
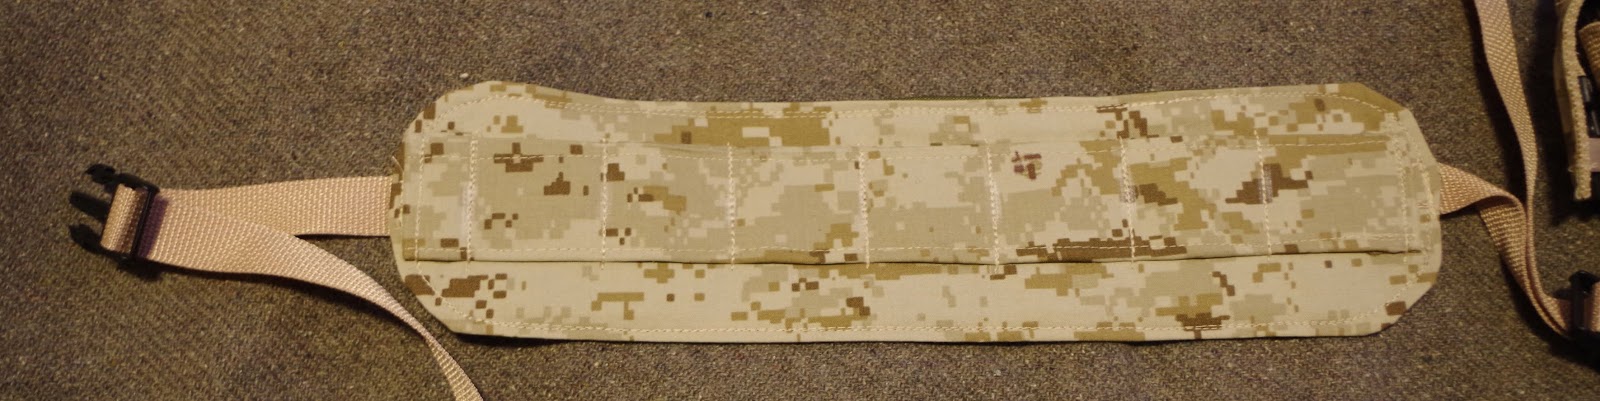
Then, the Rhodesian style harness was designed and made; followed by the waist belt. I wanted the waist belt to be more functional, so I added a back pad to form to the lower back and allow for extras to be added. This took another two hours.

The design was very simple - shotgun ammo on the left side (as you wear the rig) and a 6x6 pouch and signal smoke pouch on the right.
I explored some design options, such as the addition of MOLLE type webbing on the back of the main pocket - I did not do this on this proto-type.
One construction note: Although I thought about sewing the final assembly step by sewing good-to-good and then reversing; in the end I just top stitched the front to the back. Simple.

Next was designing the shotgun ammo pocket and the 6x6 pouch and pocket flap. And, find the pattern for the signal smoke pouch.
As the proto-type uses two fabrics, it was necessary to sew good-to-good and then reverse and top stitch. Unlike, some vests or packs in the past, these pockets were only 3/4 and did not have a back and were sewn directly onto the rig.
Lots of Velcro was used. Allows for some modifications later without rebuilding the whole rig.

I did find the signal smoke pouch pattern I used on the tactical shotgun vest (https://mtnmanblog.blogspot.com/2018/01/tactical-shotgun-vest-designed.html). This did speed things up. No need to re-invent the wheel.
I made one addition on the underside of the flap, a small piece of binding tape to hold the buckle closer to the flap, so it was not trying to fly away.

Next, the shotshell cards were built. If you have access to diver's web, that would be what I would use. In this case it was just 2" polypro webbing doubled up with loops on the front and Velcro hook on the back. I added 3/4" web loops top and bottom to allow the cards to be tied with paracord so they do not get lost.
I made 3x 6-shot and 5x 5-shot cards. Only four of the 5-shot cards fit in the pocket when loaded with 12 gauge ammo. Which means 38 shells are easily carried.

The harness is a Rhodesian style with crossed straps made from 2" webbing (doubled) with 1" webbing gear loops for the first 16" or so and 1" "D" rings about 6" above the side-release buckles.
I added a 9" piece of 2" webbing on one shoulder strap to keep the other shoulder strap from getting out of position.
The waist belt was not padded, although, 1/4" foam would be an option is padding was needed. The two layers of fabric and webbing provides enough support and comfort to the user.

Here are a few more pics. If you have a desire to make you own micro rig, I suggest giving it a try. If you are not so inclined, try contacting SOE Gear (https://www.originalsoegear.com/) and see if they have the micro rig you need.
Until next time, build it, buy it or steal it...just kidding, looters will be shot!!
Stay Safe Folks!!
Mountainman.


No comments:
Post a Comment