27 February 2013

R3 Ruck Project Part 1

 Here we go with another project in the works. The R3 Ruck Project. I am not about to proclaim I am a diehard eco-Evangelist, but will promote when and where possible it is a good use of resources and technology to reduce, re-use or recycle. Thus R3. As for the ruck, I started with an older Camp Trails Ponderosa. Purchased for a $1 at the Church garage sale.

So, this project starts by reducing, by not having to purchase new. Sorry, to the gear stores. The pack frame, still in very good condition is being re-used. This welded aluminum frame was state-of-the-art in the 1970's. The pack bag and harness are outdated and in need of replacement. The back band will, also, be re-used at this time.


 The project required fabric, plastic buckles, poly-pro webbing, and lots of thread.

The Cordura fabric, webbing, buckles, zippers and thread all came from PacCana Enterprises Ltd (Calgary, AB). I have been well treated there since 1995. It is very important to establish a good relationship with your suppliers.

The fabric for the storm collar, is a windbreaker type nylon with a PU backing. I have had it for a couple of years, and do not recall where it was purchased from. (See still re-using supplies!!)


First task was to remove the old pack bag. It was secured with an assortment of metal clips, wire and nuts and bolts. Hey, it worked.

With the exception of a couple of dents in the frame tubes, the frame was in excellent condition for being more than 30 years old.

In part two, I will post the drawings I worked from, you may enjoy them. The design I decided on was a variable geometry pack. I have made many of these in the past. What does that mean - variable geometry??? It means you can change the shape and/or size of the pack by adding or removing pockets or pouches.

The first items to be made were the removable side and front pockets. They zip on and off the main ruck. These extra pockets are meant to hold "light & fluffy" stuff. Extra fleece jacket, down jacket or vest. Or similar types of bulky but lightweight gear.

Further, the front pocket can be converted to a sling pack for day tripping away from base camp.

Next the main ruck bag was built. 

I, incorporated a row of M.O.L.L.E. compatible webbing on the headache rack above the  main bag. This will allow specialized gear pouches to be used with this ruck. Everything from canteen pouches to first aid pouches.

The top lip of the ruck main bag was finished with nylon seam tape to reduce the chance of the Cordura from fraying.
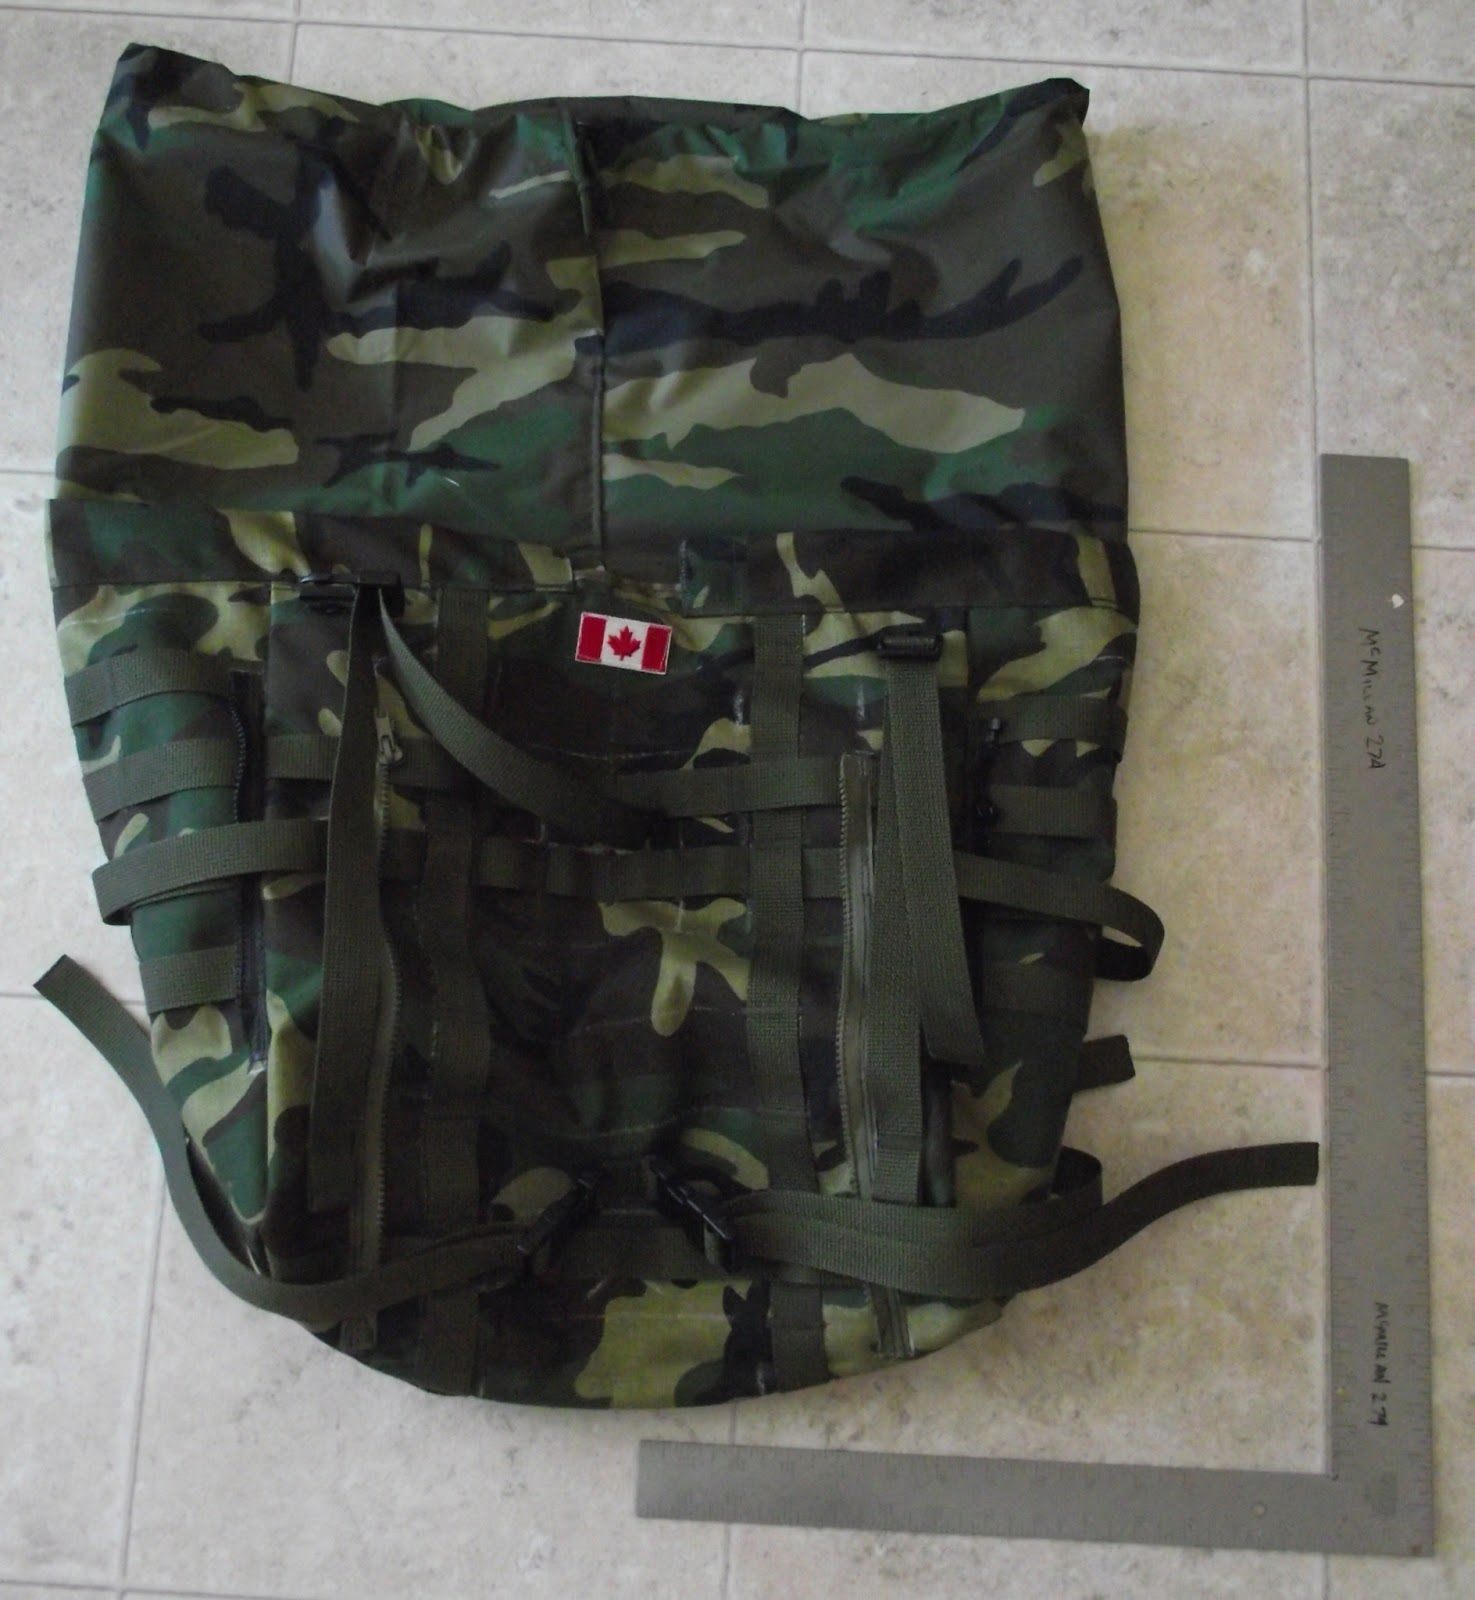
Next, the storm-collar was added  to the ruck main bag. This is a PU backed nylon fabric, light, tough and weather resistant - perfect for keeping sand, snow or rain from getting inside the ruck bag. I would still suggest packing all gear inside dry bags or Ziploc freezer bags to ensure a higher degree of weatherproofness.

The storm-collar also, allows the main ruck to be "over" packed, and still keep the gear in your rucksack. An important feature if you ever have to pack up quickly and get on the trail in a hurry.

The next feature constructed was the top pocket or the lid if you may.

The top pocket is removable, by use of side release buckets. The webbing allows the top pocket to adjust from firmly on top of the main ruck bag or rising a few more inches above to accommodate extra gear quickly packed. Or in those first aid incidents in the back country where you have to pack your buddy's gear out, too.

There are plenty of gear loops to attach those extras you just have to take with you. But cannot be hidden inside, like a machete, axe, snow shovel (winter camping) or a glowstick. 
For those familiar with the USMC sleep system that would be that very same sleep system inside the black valise. For those not familiar the USMC sleep system includes the black valise with vertical compression straps, a woodland camouflage Gore-tex bivy bag, a black sleeping bag and a lightweight olive green patrol sleeping bag.

What's next......A new waist belt and shoulder straps, as well as, a set of A7A straps to cinch everything together.

I will post an update, hopefully before the end of March 2013.

Yes, I am also working on the Pelican Toboggan covers at the moment but they are not ready, yet. Let's see how the next few days go. Fingers crossed.

Until next time.....keep your gear packed and ready to go!!

Mountainman.

26 February 2013

The Gerber Prodigy

Gerber Prodigy, Para-Frame I & Para-Frame Mini
 Some new gear for a new year. Yah!

A Christmas gift card well invested. I converted my gift card into a Gerber Prodigy. And I am very satisfied with the exchange.

You are looking at the Gerber Prodigy and you are saying to yourself, that knife looks very familiar.....If you scroll to the bottom of the page and check out the last photo, you will notice that the Gerber LMF II and the Prodigy share many features, including good looks.

For those not familiar with the Gerber line of knives I had better get some of the basic stats out for you to know the Gerber Prodigy a little better.
Overall length of the Prodigy +/- 9 7/8"
Blade length +/- 4 1/2"
Blade width +/- 1 3/16"
Blade thickness +/- 3/16"
Blade type half serrated
Sheath Overall length +/- 10 3/4"
Sheath width +/- 2 1/2"

Gerber Prodigy

Gerber LMF II
The Gerber Prodigy is a full tang design, the metal of the blade continues straight through the handle to the glass break pommel and lanyard hole. One piece of steel. This is the strongest knife construction design. Knives with hollow handles or welded tail stock are noticeably weaker than a full tang blade when using the knife in a survival situation. The half serrated blade is great for cutting cord or rope, but not so handy when trying to make a feathered stick to help light your campfire. For those who really, really do not like serrated blades, a quick solution is to file away the serrations. The glass break on the pommel is a neat idea, should you ever find yourself in a motor vehicle collision and have to extricate yourself from a burning vehicle through a window. In such a case, I would recommend a high, inverted mount of the sheath on your gear vest. 

Speaking of mounting the sheath for the Prodigy. The included sheath can be worn or mounted in a number of ways, depending on what best meets your needs at the time or your mission. As you may notice in the pics, there are mounting holes to lash the sheath to just about anything. In addition, there is the standard belt loop to hang the Prodigy from your waist belt. There are also M.O.L.L.E. compatible straps on the back of the sheath. So,  the Gerber Prodigy can be carried on any of your M.O.L.L.E. vests, bags, pouches or packs/rucks. My biggest concern with the sheath, although well constructed in China, is the lack of double or triple stitching for the main belt loop. There is very little chance the Prodigy will fall out of the sheath as it incorporates a friction lock to securely hold the knife in place. My concern is that with only one row of stitching holding the belt loop that in time, with field wear the stitches may fray and then belt loop will open. Maybe, Gerber has field tested this sheath and my concern is not valid. Only time will tell. Other sheath features include two thumb break handle straps - to ensure the Gerber Prodigy will not accidentally fallout of the sheath when mounted inverted on the shoulder of your gear vest or ruck harness. A leg strap is included to keep the Prodigy from slapping your leg while running, when mounted on a waist belt. If, there were two leg straps the sheath could be secured to your lower leg, like a dive knife for scuba diving. 

The most noticeable feature missing from the Gerber Prodigy, when compared to its big brother the Gerber LMF II, is the hammer pommel. That big block of steel at the pommel end of the LMF II, which can be used as a hammer in a survival situation.

All-in-all, I am very please with my Gerber Prodigy and look forward to having with me in the field for years and decades to come.

Until next time, 

Keep your knife sharp and close by!!  

Mountainman.

04 February 2013

Project Pelican 45 Toboggan Part One

 Time for a new project. This project starts with a stock Pelican Snow Trek 45 toboggan. Recently purchased from a local Canadian Tire store, for about $24, on sale of course. Full price around $40.

The toboggan measures approximately 20" wide by 45" long by 8" tall. Inside dimensions are of course, smaller. Material: Plastic.
 This toboggan is the right size for one person's camping gear. Winter is the time to pull your gear instead of packing it on your back. 

The challenge is, the pull cord on this toboggan is a little on the weanie side. We need to beef it up.
 Off to the local Peavey Mart store to get some hardware. Eye bolt and ring assembly 3/8" x 2 1/2" ($2.69), 2x 1/4"x2" carriage bolts + washers + nuts, sold by the pound ($0.51). Hardware = $3.20 + GST. The plywood was scraps I had in the shed. The outside piece is 5/8" plywood 4" x 6.5" and the inside piece is 3/8 plywood 4" x 5.75".

So, for the first part of this project we are still under $30.
 To prepare the plywood, I drew a centre line put a 3/8" hole at the centre and then put a 1/4" hole 2" above and below the 3/8" hole.

Then I transferred the hole placements to the toboggan.

Note: It is probably best to a fix one bolt and then drill the remaining holes through the toboggan and the inside piece of plywood. I had to drill a second bottom hole through the inside piece of plywood because the holes did not align properly for the bottom carriage bolt to go through. Ooops. My bad. 

Next insert the bolts and snug the plywood together.
It may take more than one tightening to get the plywood tight enough to get the washers on. I was only able to get the small flat washer on the eye bolt on the inside. I still have the large flat washer and lock washer. If in the future the eye bolt needs to be re-tightened I may develop more space and will use the other washers in the future.

Speaking of the future, this toboggan now needs a fabric cover and a harness. I will be making the traces out of 1" tubular webbing, mil-spec with a breaking strength around 2500 lbs. 

Colours to be determined. Red and blue 1" tubular webbing shown in the last pic. 

This modification will not likely be silent, as there is metal on metal contact with the pull ring and the eye bolt, but I was not making a tactical toboggan anyways. 

One of my suppliers sells a 420 denier pack cloth in white and I think that is what the cover will be made from. 

I will try to upload part two in a couple of weeks once I have built the cover. Then I will attach the cover to the toboggan. It will be laced on. Then this toboggan will be ready for a trip to the field.

Until next time.......keep your gear covered!!!

04 January 2013

Gearing UP! Khukri Machete Sheath

 What do you do when you get a new knife, and the sheath that comes with it is crap??  

One solution, of course, is to not buy the knife to start with. 

The other solution is to build a new sheath.

If you are skilled at working with leather, build a leather sheath.


 I, however, am more comfortable with textile fabrics - like pack cloth, canvas, & Cordura.

So, when I acquired a Khukri Machete from Cold Steel, I was very pleased with my new blade. Not-so-much with the limp, cheap sheath. The included sheath provided the most basic protection to the blade but not much else. Too bad, because I bet that the poor quality of the sheath deters many from buying a very serviceable field knife.
 I decided the best course of action was to build a new sheath. So, I incorporated the required features from the original sheath - open back to allow the curved blade to exit or enter the sheath and went from there. I used 2 layers of 1000 denier Cordura fabric with 1/4" foam sandwiched between. So, in total I have 4 pieces of 1000 denier Cordura and 2 pieces of 1/4" foam - one set for the front panel and one set for the rear panel. Then I used nylon binding tape to finish the edges of the front and rear panels. I then added the webbing and Velcro, before assembling the front to the rear.
The straps, snaps and loop were added last. The lower of the two straps, wraps completely around the sheath to assist in securing the Khukri to a pack that has MOLLE webbing or gear loops.

While not perfect, I am pleased with the finished product.

So, when needed, build your own gear.


Keep you gear covered and ready to go!!

Mountainman.

17 December 2012

Basic Shelters


 So, lately I have been thinking about shelter. Let's start with basic tarp shelters. These can be as simple or complicated as you like. 


 At a not-too-long-ago training session with Cub Scouts, we did start to teach basic shelters to the kids. They had a real good time and learned a few things, too.


 The first shelter, on the right, was a 6'x8' tarp anchored to ground on three corners and raised up on the forth corner. This shelter is very good to keep you shelter low and out of the wind, as well as, keeping what little heat you have from having to warm a larger structure. Ideally, you would place a small campfire in front to get a little more warmth.


 This next shelter is a classic tarp lean-to with a front drip shield to keep rain from blowing in the front opening. 

With a small campfire with a reflector wall, this shelter will keep you alive in many rough weather conditions.

The front 1/4 to 1/3 of the tarp is folded over a ridge pole or ridge line to provide a rain deflecting slope. Make sure your fire is beyond the drip zone, so the rain water does not put out your campfire. 


The structure I really wanted to talk about is a woven willow frame shelter. This is a shelter made by tying together supple tree branches to form the frame for your shelter and then securing a tarp over the shelter to make it more water proof. 

For those wanting to setup a bugout location on Crown land - not that I am recommending or endorsing this behaviour - merely suggesting a shelter type that may work well in that situation. I shall continue with the woven willow shelter, some may call it a wicci up (not sure of the real spelling). 

Unlike, the same shelter for emergency purposes where you tye the branches together for a temporary shelter. For a BOL, I would suggest finding a select grove/stand of willow trees to permanently tye together. Determine how large you would like your shelter to be. Bring your tarp to make sure. This process may take 4 to 5 years to get the exact structure you want. You will need fencing or linesman's pliers, pruning shears, loppers, pruning saw and a roll of tye wire. If you want a lean-to style you will be leaving the front open - where your fireplace will be or you may want a traditional wicci up style - which is more domed shaped with a small igloo type door to enter your shelter. You decide. 

You will need at the very least a two trees on a North/South axis and two trees on the East/West axis. Actual compass direction not important. The more trees used the stronger and the better. First make your North/South frame, bend a tree from each direction, hold at the proper height. Have your helper cut a piece of wire and tye the trees together. Depending on the span and the thickness of the trees, you will need 5 to 7 tye points along the frame. 

Next tye the East/West axis frame. This gives you, basically two poles that connect the ground in four points. 

With the remaining trees in the stand/grove tye two more poles - if you have the trees to work with. Southeast to Northwest and Northeast to Southwest. 

Use any other tree in the stand to weave between your now four poles. This may take a season or two to achieve, as the supple, weave-able trees may take a season or two to grow long enough. As I said earlier, it may take 4 to 5 years to get the frame the way you like it. Use the tye wire to anchor the inter-weaved branches in place. 

Now it is decision time again. For the shelter to be truly ready all the trees in the grove/stand that are  in the way of using the shelter need to be removed, via pruning saw, shears or lopper. By removing the extra trees now, others may find and use your shelter. If you don't remove the branches now, when you come to occupy your shelter you may be without the proper tools to remove the undergrowth. You know your area better than me, do what you know is right.

One last point, visit your site as you need to. On each visit weave more and more branches or trees into your shelter frame. In time it will begin to look just like a natural thicket. In fact if you have enough time for this project you can secure your tarp on the inside and the outside will be naturally camouflaged.  If you are working with Alder instead of willow, in time you might not even need a tarp to be weather proof.

I hope this helps some of you out there.

Keep dry and warm,

Mountainman.


07 November 2012

The Chuck Box Part II

 Thank you for your patience. The weather finally co-operated on my days off and I was able to snap a few more pics of the Chuck Boxes.

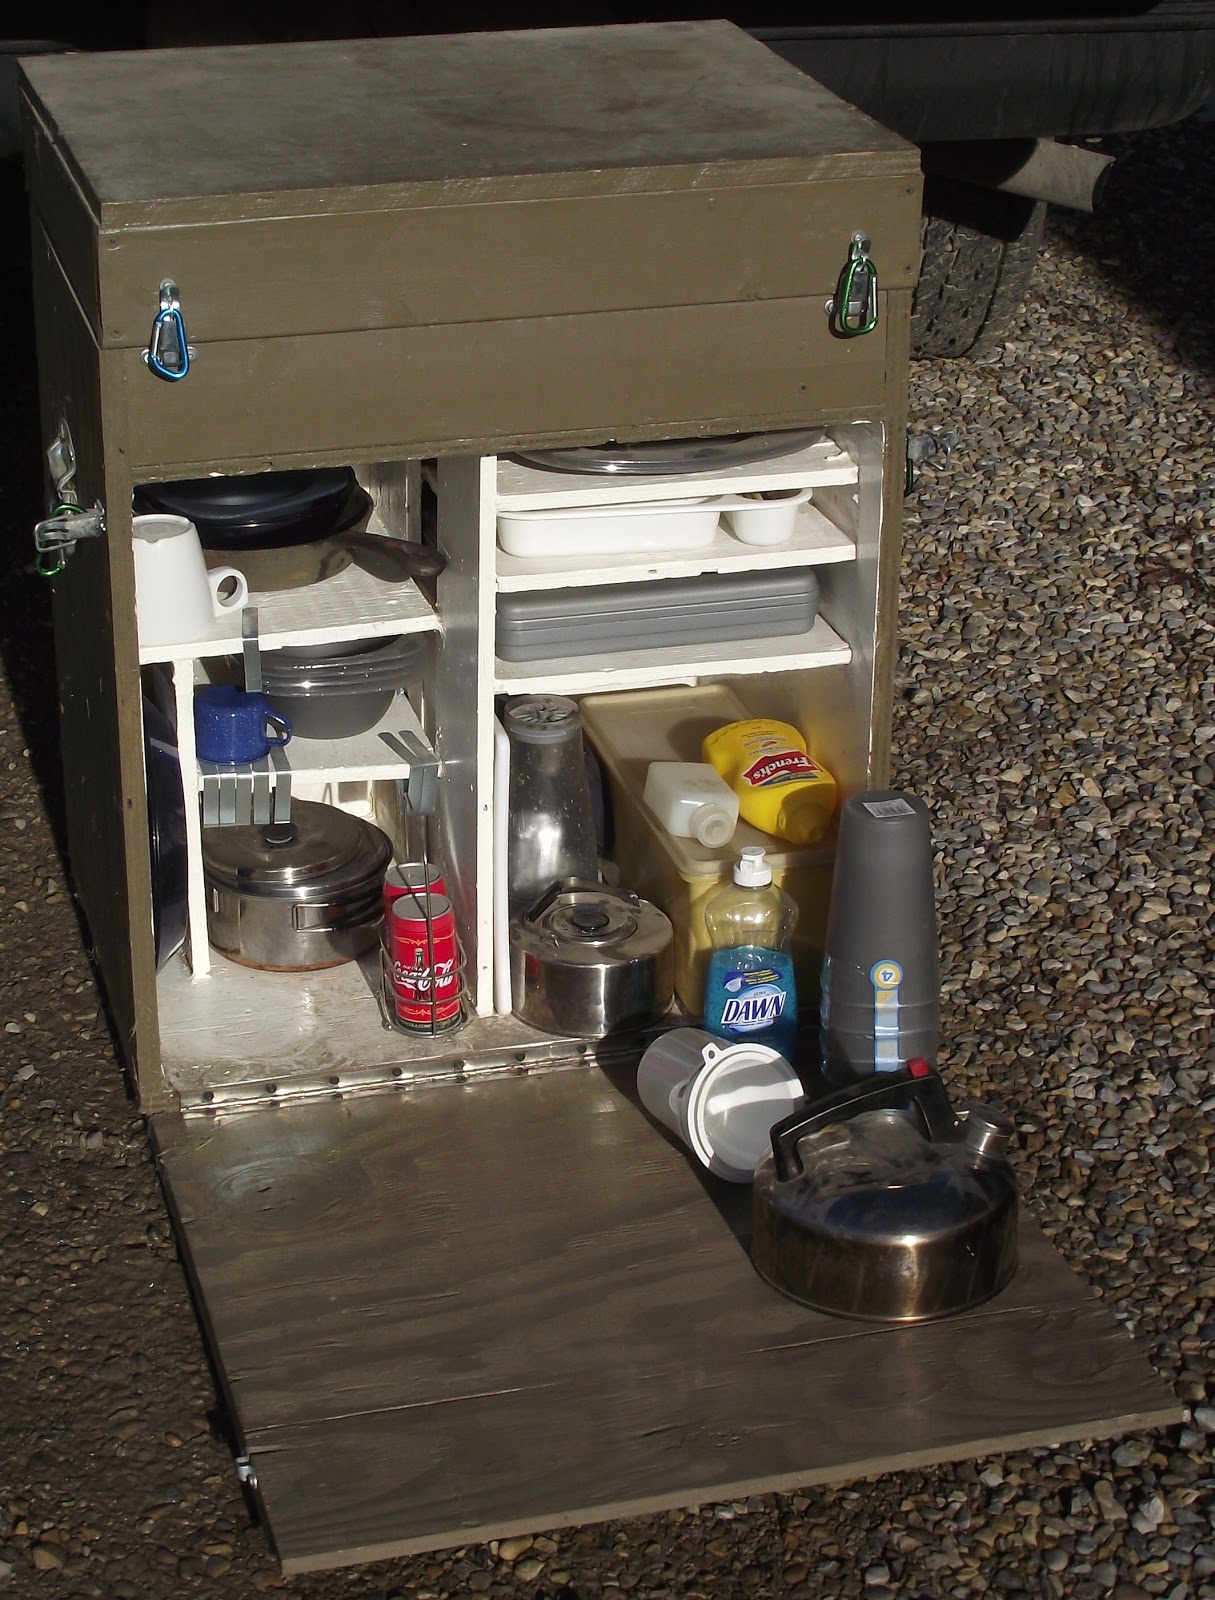
For clarity sake,let me name my Chuck Boxes. The smaller unit I will refer to it as The Pantry. Where as, the larger unit I will refer to it as The Kitchen. 

Dimensions:

The Pantry - 24" Wide x 19" Tall x 18 7/8" Deep

The Kitchen - Lid - 24" Wide x 4 1/4" Tall x 18 1/8" Deep
The Kitchen - Main - 24" Wide x 25" Tall x 19 3/4 " Deep
 The Kitchen Lid is constructed of a 3/4" Plywood top and framed with 1"x3"'s. Inside the lid I fastened 6x 1" cup hooks to hang the utensils and whisks. I then added, two small eye hooks and a short piece of 1/8" bungie cord to hold the untensils in place when the lid is opened or closed. So, far the bungie cord has worked great, the utensils move a bit but they do not fall out nor get in the way of opening or closing the lid.

The top portion of The Kitchen Box is where I store my 2 burner Coleman Stove, this stove is a propane unit. My family prefers this stove to our other Coleman 2 burner that uses white gas/naphtha.

I also have a cast iron griddle that stores on top of the stove. Having enough room up top for more items, I also have plastic wrap, wax paper and tin foil, as well as a couple boxes of matches.
 I did not design nor desire to operate the stove while in the box, for a few reasons. The main reason was cleanliness, food or grease splatter would be difficult to clean from inside the box. The better solution if table space was in short supply would be to operate the stove on top of the closed Kitchen Box. 

You may notice that I have used a strip of piano hinge to attach the lid to the main box of the Kitchen. I believe this makes for a stronger unit, plus it saved me the step of trying to mount two smaller hinge units equidistant from each other. If you missed my first post on the Chuck Boxes, I fully admit to not being a carpenter nor cabinet maker.

One final point, I added the string to keep the lid from opening too far and putting too much strain on the piano hinge.
 In building these two Chuck Box units I found, although heavier, the 3/4" plywood is much easier to work with. There are fewer episodes of the wood splintering, compared to the 1/2" plywood. Just something for you to keep in mind. Also, once the unit is made from 3/4" plywood it is very strong, strong enough that I can stand on the unit if need be. 

The lower unit in the Kitchen is for storage of plates, cups, mugs, bowls, cutlery, kitchen knife set, kettles, pots with lids, cast iron frying pan, picnic table clips, measuring cup and my Coleman lantern. Not currently being stored in the Kitchen at the moment. 

The shelves on the right have an inside span of 11", enough to fit the plates and the cutlery tray. Also these shelves are almost full depth.


The shelves on the left have about a 10" span and have less than 12" in depth, so the Coleman lantern can fit in front for transport to the camping grounds.

The centre spars were made with two pieces because I ran out of 1/2" plywood. Looking back, it was good compromise because it allows light to the back of the shelves.

Note to self, if I make this project again - paint the pieces before assembly!!  My hand and arm could only reach in so far after construction.
 The Pantry. I wanted my kitchen sink to go camping, that would be that grey industrial tub on the top shelf. But, I did not have room for it in the Kitchen Box. I didn't want to make the Kitchen taller, because it would have been harder to load and unload from a vehicle. Solution build another purposeful Chuck Box.

Now that I was committed to a two box system, I had more options and more space to work with. 

First, Del Monte started to pack their fruit in plastic jars that had rings and lids like a Mason Jar. Plastic does shatter when it falls out of the cupboard. I was sold. I started buying Del Monte fruit, so I could have the plastic jars. I made the bottom shelf to fit.
The middle shelf is taller enough for boxes of Quaker instant oatmeal. Not stored in the Pantry in the off season. Currently, the middle shelf is storing empty water bottles for hiking.

During transport, you can see the kitchen sink is also useful to store the clothes pins, pot holders, oven mitts, wash cloths, garbage bags, tea towels and any spare Del Monte jars that did not find a room on the bottom shelf.

You may notice the Pantry Box is longer than my kitchen sink, so to resolve any possible issues of the kitchen sink moving around during transport, I installed a divider, which just happens to be the 
exact width for spice jars!! How lucky can you get. I know what you are thinking, how do you get all those jars out of that skinny hole?? I added a piece of cord, long enough to go there and back again. So, with the cord against the last spice jar, I would slowly add each following spice jar and slowly release tension on the cord. When all the spice jars were inserted a short piece of cord was left hanging out. The get the spice jars out at camp, simply add tension to the cord with a light pull and one by one the spice jars exited their storage place. 

I sure hope these new photos and the exterior dimensions help some of you out there. I never would have thought my original post about Chuck Boxes would have become this popular. Thank you for your interest. 

I am still searching for my original plans, but we had a move of residence from when the Chuck Boxes were built to when I started to write my blog. I have a large ominous black filing cabinet that needs attention, which I keep putting off. I am almost certain, that somewhere inside that cavernous interior I will find my missing plans. 

Until next time, Keep your kitchen tidy and your food secure!!


Mountainman.

01 November 2012

Oldschool Blacksmithing


The Foundry at L'Anse aux Meadows
 Once again, it has been too long since my last post. Many apologizes. I know I should go to visit my Chuck boxes and gather dimensions and more photos. The weather has been less than perfect for photos, so I wait.

Another mountainman skill that most should brush up on is blacksmithing. Nothing like the smell of hot coke smoldering in the forge, with a twist of burnt used motor oil in the quenching bath and the ring of the hammer on the anvil creating a new tool or weapon from the raw ingredients from the Earth.
The Blacksmith Shop at L'Anse aux Meadows
 Aghh! And fire made it good!!

During my travels this summer I had the pleasure of visiting many blacksmith shops across the country: L'Anse aux Meadows, Nordstead, Louisbourg, Iona, Fort William, Bar U Ranch, to mention but a few. The most intriguing new discovery for myself was the anvil carried by the Vikings. Unlike the traditional English Anvil with its large footprint to secure it to the wood block the Viking Anvil was a portable anvil, quite light on about 30 - 40 pounds. However, it has a point on the bottom. It was designed to be hammered into the wood block.
The Viking Anvil at Nordstead, NLFD
 So, the Vikings would cut a block to the correct height for the blacksmith and then they would hammer the anvil until it was seated to the perfect height. If the anvil was removed, simple wood wedges were employed to re-secure the anvil to the wood block. A simple, yet ingenious method of making practical and portable tools.

Hard to believe the Vikings were able to secure a supply of iron from the bogs of L'Anse aux Meadows, Newfoundland. But, legend has it the Vikings recognized the tell-tale signs of the presence of iron below the peat and with much labour were able to excavate enough "bog iron" to smelt and forge enough nails to repair a damaged long boat. Of course, this repair job took around two years - because they had to build a village to survive the approaching Winter before they could resolve to repair the vessel.

The Twin Single Bellows at L'Anse aux Meadows
The Blacksmith Shop at Fort William, ON
 The top picture is of the foundry, where the "bog iron" was transformed from muddy slime to metal, the slag was discarded on the ground, to impure to even make nails. The iron bars poured at the foundry were then taken to the blacksmith shop and with the aid of the forge and anvil transformed into the 200 to 400 nails required for the repair. The blacksmith shop had a set of twin single bellows to maintain airflow into the simple forge. But, enough heat was generated to heat the iron to a workable temperature.

Compared to the Blacksmith Shop at Fort William, near Thunder Bay, Ontario. The Viking Blacksmith Shop was quite primitive. 

The art of blacksmithing is a dying art. Once one of the most important occupations in a community, it is now merely a hobby for the many who continue to practice the art. The farrier, the blacksmith who builds horsehoes and shoes horses, is a specialty that continues on due to a love people have for their horses. But still, the numbers of farriers doe not grow and someday in the future we may run out of them, too.

As with other specialties of the blacksmith trade/art (swordsmiths, armourers, knifesmiths) there are too few, spread too far apart.

 For those wishing to learn more about this art before it is gone, I highly suggest reading and practicing the lessons taught in Alex W. Bealer's The Art of Blacksmithing available at amazon.com.


Product Details
Excellent Guide to Start From

 So, keep your fires hot and your hammer ready!

Mountainman.