27 March 2016

Passport Neck Pouch with LOKSAK Insert

Finished Passport Neck Pouches
This has been a good month for Blogging and gear designing. This makes 7 posts this month.

I have recently discovered that The Shooting Edge in Calgary, AB (www.theshootingedge.com ) has a supply of LOKSAK products. These are the guys who build waterproof pouches to protect your gear - from cellphones to rifles. Learn more at: (www.loksak.com). 

Today I am interested in the LOKSAK model# aLOKD2-4x7. This the size to protect cellphones
The Plans
Start

LOKSAK Passport Pouch
and passports. Which is the project we want to complete.....a passport neck pouch. Now, that LOKSAK is handling the waterproofing, this opens up the fabric choices. To be lightweight and tough I am opting for Commander DWR type fabric. This has a light water repellent finish but still tough enough for day-to-day use.

There is nothing fancy about this pouch, just finish the top edges (front & rear), add Velcro hook & loop, a belt loop and sew up the side seams. 

The fabric wants to be: 6" x 22". Any smaller and things get a bit tight. Remember to test the rolltop before deciding where to place the Velcro hook and loop. Chalk the locations.
Layout

Placement of Velcro & Belt Loop

Finished

Centre the belt loop and have the top of the loop about 6" up from the bottom of the finished pouch. Sew the belt loop so there is enough space at the top for the neck cord to pass through.

Once everything has been added, lay the pouch - goodside-to-goodside and sew the edge seams. 1/4" side seams should be the maximum size. Sew another set closer to the cut edge. Invert the pouch and topstitch down both side seams, using very close seam allowance - 1/16th of an inch.

Last step, cut and melt the ends of your cord. Feed through the top of the belt loop. Tie into a loop using a double fisherman's/double blood knot. Insert passport into the LOKSAK and insert the LOKSAK into the passport neck pouch. You're done!!

Until next time.......go traveling!!! Don't forget your passport.

Mountainman.
Test Fit

Right Size


24 March 2016

Cubist Escape Sling Pack - Part Five

The Plans
Installment #5, designing & building gear tacos to hold beverage bottles. I guess we will call these, Beverage Taco's.

I have come to enjoy building anything that uses a taco design. What's not to like, They are big long strips, that lace together after everything is sewn in place. No tight corners, no curved radi, no cursing.

I tried to keep weight down on these tacos, so I have used 3/4" webbing on the front & bottom, while reserving 1" webbing for the back where the taco has to mesh with the MOLLE style webbing on the pack. I, also opted to use MOLLE straps that were sewn to the taco.

These tacos were built from Cordura cloth that is heavy-duty. I also made the choice early on to just cut a 6" wide
Start

Spacing
 fabric piece to fold in half, instead of cutting two 3" wide pieces & then sewwing them together. In the end, the fold & sew method seems to be easier and faster, with less chance of piece shifting out of place.

I spaced the webbing strips starting on the back. Centred the bottom strip and spaced the front strip accordingly.

I used a 3/4" web strap with another 3/4' webbing to make the water bottle holder. The top piece was 5" long, sewn 2.5" from the end. 
Although, I used 13" long straps;
Centre Seams
next time I will use 15" long straps to add options when mounting the tacos to the pack or gear vest.

The short strips were sewn to the taco along the centre seam first. Then the rest of the taco was built and finished with seam tape. Lastly, the ends of the short strips were folded under & sewn, ensuring to leave enough loop on the ends for the cord or para-cord.
Close-up Folding for  Webbing Tail

Almost Done
 The MOLLE anchor straps were the very last items attached to the tacos. After a trial fit on the pack, the location of the snap studs were chalked, punched and then snap studs were fitted.

These gear tacos seem to work well. I will add more photos.

Till next time......keep trying new ideas!!

Mountainman.
Snaps Added

22 March 2016

Cubist Escape Sling Pack - Part Four

Plans for the Cellpohone Pocket
Cubist Escape Sling Pack - fourth installment, the cellphone pocket.

Now this style of pocket could be used for other uses, if the right size is used. Like a compass pocket, GPS pocket, heck could even be used to hold magazines for you favourite rifle.

This pocket was made from Cordura fabric, which is quite heavy-duty. The inside is lined with polar fleece, to protect the screen from scratches and add a bit of padding to absorb a bit of life's rough handling.

To maximize the effectiveness of the polar fleece, I attached all the webbing and buckles before sewing the outer to the inner. You could sew through the whole thing, but that might not work so well for your cellphone screen. Your choice.


Start
The only big consideration is whether to use 2 or 3 Vecro straps on the back of the pocket. I used 2 because this cellphone is not too heavy. I, also added a snap hook, to anchor the pocket to the upper "D" ring on the sling strap. This addition also allows the pocket to be used on other packs or gear vests or parkas that might not have MOLLE style webbing to anchor to.

That is about it, folks.

Until next time....keep busy, learning new things!!

Mountainman.
Next

Webbing Complete


Finished

Fit Test

Cell & Pouch

Attached to Sling Strap

20 March 2016

Cubist Escape Sling Pack - Part Three

Solar Panel Pouch for Inside Cubist Escape

The Start
Installment #3 - The build continues. Today we have added an inside pouch to hold the Goal Zero Nomad 7 solar panel.

When the Cubist Escape was designed and built, I foresaw the need to be adaptable, thus the MOLLE style webbing on the exterior and the Velcro loop on the interior. The first major option for the interior was a place to safely store/carry the solar panel.

This pouch/pocket is very simple....nothing fancy here. Fold over the edges and top stitch. Side seams - goodside-to-goodside, sew and finish with seam tape. Re-vert to goodsides on the outside. Sew on the Velcro hook on the back.

I did put a Vecro loop patch on the front and added a short webbing with Velcro hook to keep the solar panel in the pouch.


Lastly, was fitting the pouch to the Velcro loop inside the Cubist Escape. Viola, finished.

Note to self, future inner pockets and pouches want to be 9" wide, not wider.

This pouch is very light and still very functional.

I hope you enjoy the pictures.

Until next time.....keep working on past projects!!
Mountainman.
Finished

Fits Well

Velcro Hook on the Back

Inside the Cubist Escape

13 March 2016

Cubist Escape Sling Pack - Part Two

Fold in Half, Sew Foam in Place
 Here we are again. Part Two of The Cubist Escape.

Made more progress than I hoped I was going to achieve today. So, you get rewarded, too. Two posts in the same day.

We left off with the large piece of fabric with Velcro loop and 1" webbing sewn to host MOLLE pouches or pockets. The next step was to cut foam to insert into the folded piece of fabric. After the foam was secured in place, any excess was trimmed off. Next the corner seams were top-stitched to help the corners form. Then, the major side seam was sewn closed and select corner seams were top stitched again to create more defined.
Sew Up Side Seam

Centre Bottom Panel
Next the lower shoulder strap anchor was sewn together and then added to the edge of the pack. Centred so the pack can be used slung over either the left or right shoulder.

The bottom panel (10"x10) was centred and sewn to the bottom. Now that the pack is taking shape, sewing becomes more difficult. A helper is sometimes needed, when you need a third hand.

Then the major side seam and the bottom seams were finished in seam tape. Now they look real nice and professional.

Next on the construction list is building the top flap.More 1" webbing sewn to MOLLE spacing. And a pocket added to the underside. Seam tape to finish the edge seams around the top flap. Non-separating zippers attached on the left and right sides. Velcro hook and a Canadian flag added to the front of the flap. Also, a bit of top stitching to give the front edge some form.

Before attaching the top flap, the shoulder strap needed to be built. This time we are working with a longer strap, about 27" long. Still, have 1" webbing on the topside, but I omitted the 2" webbing from the underside. Weight is beginning to be an issue here. A utility/knife pocket was added to the underside, just because. Then padding material was added and then top& bottom were sewn together. Finished with seam tape.
Finish Seams With Seam Tape

Top Flap

Shoulder Strap

Major Components Complete

End of Day Two

Next the shoulder strap was sewn in place at the top of the back panel. Then the fun began.....the top flap.

As I suspected, once the pack was taking form, it would become more difficult to sew. I was not let down. It was a bit of a wrestling match to get the zippers sewn to the top of the left and right  sides. I did the best I could, not perfect.......but, operational.

The last success of this day, was the strap to connect the shoulder strap to the anchor. Just a piece of 1" webbing about 26" long. A 1" plastic snap hook was sewn to one end. Then the other end was fed through the 1" Super Lock Buckle on the shoulder strap and sewn in a loop that cannot return through. 

In part three, I will tackle specialty pockets for: Solar Panel, water bottles and anything else I may have forgotten. 

Until next time.....don't let a good day prevent you from posting twice on your Blog!!

Mountainman.

Cubist Escape Sling Pack - Part One

First Design Page

More Details
So, I have not had enough time to complete this pack yet, but it is slowly coming together.

This is the Cubist Escape Sling Pack. It will be in the running to be used as a carryon bag for a future adventure. The Cubist Escape will be paired with a complimentry, removeable mini-pack called the Bailout Cube. Together, these two packs will be 9"x9"x27". The Cubist Escape will be 9"x9"x18" and the Bailout Cube will be 9"x9"x9". 

My intention with this sling pack is to get the solar panel unit inside the pack & close to the back. The solar panel unit will help provide structure to the pack, while the pack provide protection to the solar panel. 

Other items that will go in or on the Cubist Escape will include: A poncho liner(Ranger Blanket), a full change of clothes - zip-off pants, shirt, underwear & socks; as well as, other bulking items. Water bottle holders will attach on the exterior. 

Speaking of attaching.....this pack has a lot of MOLLE style webbing straps to anchor many MOLLE type pockets or pouches. My original idea was to have 7x 1" webbing strips surround the pack, but after cutting and attaching 6x 1" webbing strips, I decided weight was becoming an issue. Not a good idea to make a carryon bag too heavy.

You might have noticed that this pack does not have many pieces....And, you would be correct. I have a one piece design to be the outside, inside - front, back, left & right. This pack will have one major seam not counting the bottom seams. The top will attach via: zippers, velcro, side-release buckles and one sewn seam. I have also designed this pack to work either slung over the left or right shoulder. Time will tell if this works as planned.
More Planning
 I will again try to utilize a wide shoulder strap with a minor taper. The cell phone pouch will again be attached to the shoulder strap. 

Initial design idea is to have a long should strap so the Bailout Cube can be temporarily attached to the Cubist Escape for boarding aircraft. Once on board the Bailout Cube can be detached and utilized during the flight, while the Cubist Escape is safely stowed in the overhead bin.

That is all for now. I will update as progress is made.

Until next time.....if your first try does not make you happy. Design & build a new pack!!

Mountainman.
Enough Final Detail to Work With

Chalked Design on Fabric

One Piece Will Become Inside & Outside - Front, Back, Left & Right Sides

10 March 2016

Mountainman's Clipart

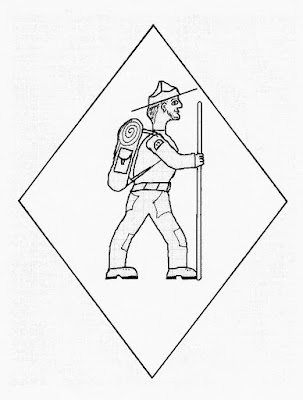
Traveler

Adventurer

Photographer
I was working on a side project last weekend, which resulted in needing some images. So, in Mountainman fashion, I had to draw them myself....can't contract out these kinds of projects. 

All of these images were drawn, in some places with the aid of a straight edge, by hand on grid paper. Initial stage was drawn and corrected with pencil, before the final stage was inked in. Then the rough drafts were scanned and made into JPEG images. 

These new JPEG's were opened in MS Paint and all the tell-tale grid lines were erased. And in some places, lines were darkened. The images were then opened in an open document program and sized down, printed and scanned again. 

I am happy with the quality of the finished images. If anyone wishes to "borrow" these images for their own project, I do not mind so long as image credit is given to me. And a link to this Blog is given in the source bibliography. If credit is given, you have permission. No credit to the artist = stealing. 

Until next time.....if you need something done,
Get off your butt and do it!!!

Mountainman.