The R3 Ruck Project is pretty much complete. I have two straps to attach, the A7A Straps.
As promised, here are my notes that I worked with to build the ruck. Not huge amounts of detailed drawings but enough to work from.
The first page contains the measurements of the ruck frame that I had to work to fit. Next is the basic layout of the main ruck bag and the pockets and features I would like to have. One thing I have learned in the last decade or so, when designing gear, and that is sometimes you do not get to incorporate all of the design ideas. The ideas may be good ideas but when you are actually building the ruck, you may decide later that the idea does not blend in well or plain does not fit the space available. Case in point, I had thought of using 2" common loops to guide the A7A straps, but when I was building the pack it became apparent that the main ruck bag would be too bulky if I had added a couple
rows of 2" webbing.
The next page was for designing the pockets, the side and front zip-off pockets. These pockets are removable so the ruck can have extra capacity when needed. When not needed the pockets can be removed and left at home.
The removable front pocket was designed to be used as a sling pack, for day tripping from base camp. It has been my experience that zip-off pockets work well for these type of pockets, just remember to install the zippers so up have to unzip in the up direction, that way you do not have to worry about the pockets unzipping themselves when loaded.
Next, the top pocket was designed. Although, designed to use a skirt, do to a lack of materials at the beginning of the project, I decided to skip it. If I were to make another ruck bag to fit another Camp Trails Ponderosa frame, I would use a skirt on the bottom edge of the top pocket, because it helps keep rain, snow and debris from entering the main ruck bag when on the trail.
Features. What do I want to have on the ruck?? By writing a features list, early in the design process I can ensure to use as many of the ideas I have thought about and written down as possible.
The key clip, goes inside the wallet pocket on the bottom of the top pocket. For those who have ever had to leave their vehicle for a week or so at a remote parking lot, will appreciate having a secure place to keep the vehicle keys. It sure sucks to return to your vehicle and not be able to find your keys and have to unpack your ruck in the parking lot, only to discover the keys were in to pocket of your hiking shorts.
The harness. The shoulder straps and the waist belt. The most important part of the pack and some of the most fiddly work. The finished product has to be loose enough to fill with foam, but tight enough not to allow the foam to move or roll when in use. My success with harnesses has been mixed, some worked others not so much.
In the end, I opted for a basic "H" harness for the shoulder straps. The system used was a 6 point harness, top and bottom anchor points plus riser straps. I wanted to have the haul loop integrated into the shoulder straps, but in the end I was not able at this time make a design that I could work with. Maybe next time.
The waist belt was a standard waist belt with gear loops, plus attachment points to attach to the ruck frame.
This next page shows all the pieces to cut, their size and how many. I wanted to add a water bladder pocket, however, once the webbing was sewn to the exterior of the main bag I discovered that the water bladder pocket landed right on top of the webbing. So, in the end the water bladder pocket will be modified to attach to the exterior of the ruck. All dimensions are in inches.
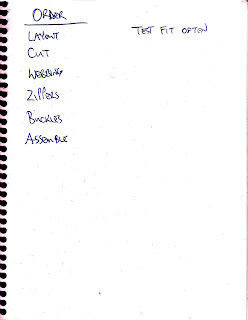
The last page was just a reminder to me about the order to build the ruck in. As it was, the front anchor straps for the top pocket were accidentally omitted. Luckily, I noticed the error before the stormcollar was added and was able to attach them late.
One thing I did not do on this particular ruck, was to keep a log of every piece of webbing used. Helpful if you are making another project of the exact same design. For one of, type projects keeping a log of webbing used is good way of figuring out how many feet of webbing you used in total for your project.
I will get more pictures of the R3 Ruck Project soon. If all goes well today I will start on the cover for the Pelican Toboggan Project.
Until next time......keep you ruck ready and your toque on!
Mountainman.
.JPG)

.JPG)

.JPG)
.JPG)
.JPG)
.JPG)


