 |
| The ANT 21 Antenna Pouch |
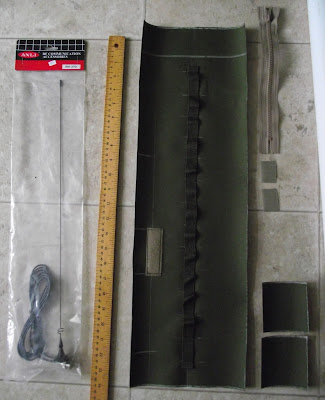
This antenna pouch is about 21", thus the tag of ANT 21. The last in this series will now be labeled as the ANT 24. The first one should be called the ANT 16.
While the ANT 16 utilized outside seams for the top and bottom, just to ensure the 2" PVC pipe would fit; I am now comfortable to finish the pouch with inside seams. I believe using inside seams on the ends of the ANT 21 produced a cleaner looking finished product. Less chance for snow to build up.
I have also made a few more notes on the plans and have included the update plans below.
Link to part one:
 |
| The NEW Plans |
 |
| ANT 21 Start |
 |
| ANT 21 Layout - Webbing & Velcro Marked |
 |
| ANT 21 Webbing Attached |
 |
| ANT 21 - Snaplink Upgrade |
 |
| ANT 21 - Moment of Truth |
 |
| ANT 21 - Yes, It Fits!! |
 |
| ANT 21 - Attached to the Cubist Escape |
 |
| ANT 21 - Looks Good |
The ANT 21 was constructed the mirror to the ANT 16. Meaning the hook & loop, as well as, webbing anchor straps were placed on the left of the pouch, so the finished pouch would mount on the right side of the Cubist Escape.
Other than the longer/taller size and the addition of the webbing under the cap; this pouch was constructed the same as the ANT 16.
First the fabric was laid out and marked.
Then, the webbing and hook & loop pieces were cut. Frayed ends were melted in the flame of a candle.
Next, the centre webbing was sewn to the fabric, spacing about 1 1/2" apart. I pulled the webbing so it was not sewn flat, to make it easier to pass webbing straps through if mounting on another pack.
As I mentioned earlier, I added a webbing loop under the cap of the pouch to allow a snaplink to attach, to prevent the antenna cable from crushing the antenna while in transit or storage. (See picture to the right.)
Forth step, cut top from body and sew in the zipper. Finish with seam tape.
Fifth step, goodside-to-goodside, sewn the main seam. Finish with seam tape.
Next, use your tailor chalk and trace around the PVC pipe onto your squares of fabric, on the good side. Then, start to sew the bottom of the main body to the end piece (square of fabric). A third hand or a pair of forceps are quite helpful here. Finish with seam tape.
Repeat, the same process with the top end piece. Remember to leave enough room to insert a finger to open the zipper once the top is finished.
Next, revert the fabric so the good side in on the outside.
Insert the PVC pipe into the finished pouch and attach to your pack.
That's it. Easy as pie, right......
This project took me about an hour and a quarter to finish, but I was taking my time, as well as, taking photos of each stage. Some of you out there could probably build this project, start to finish, in about 45 minutes. 20 years and I still sew slow.
I hope this project has been helpful to some of you out there. I hope there is enough detail for you to build your own.
Until next time......build something, and then make it better!!!
Mountainman.
No comments:
Post a Comment